
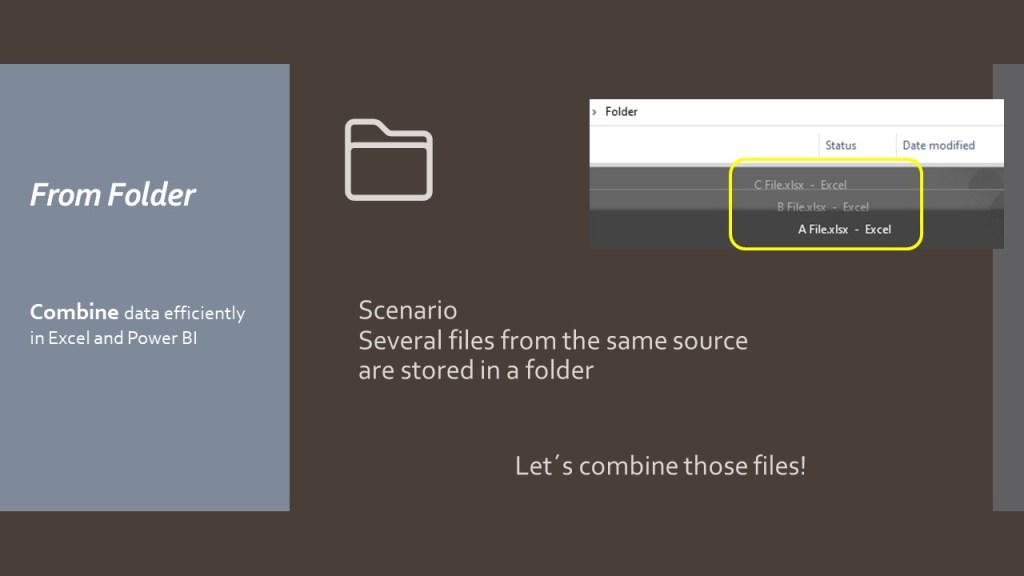
Connect and append files dynamically!

This is the Excel sequence to append files stored in 1 folder:
Your files must have the same column number and column names!
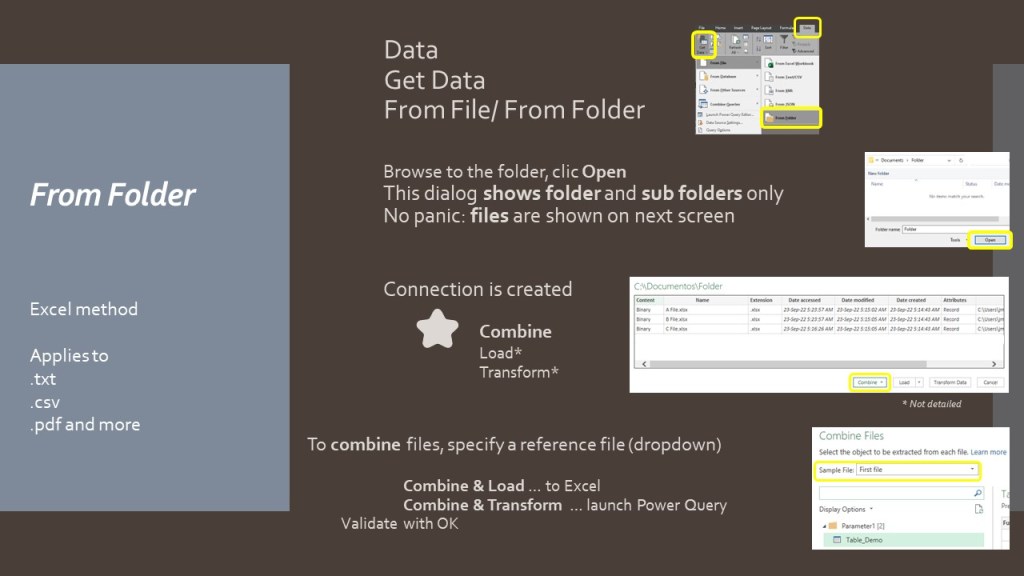
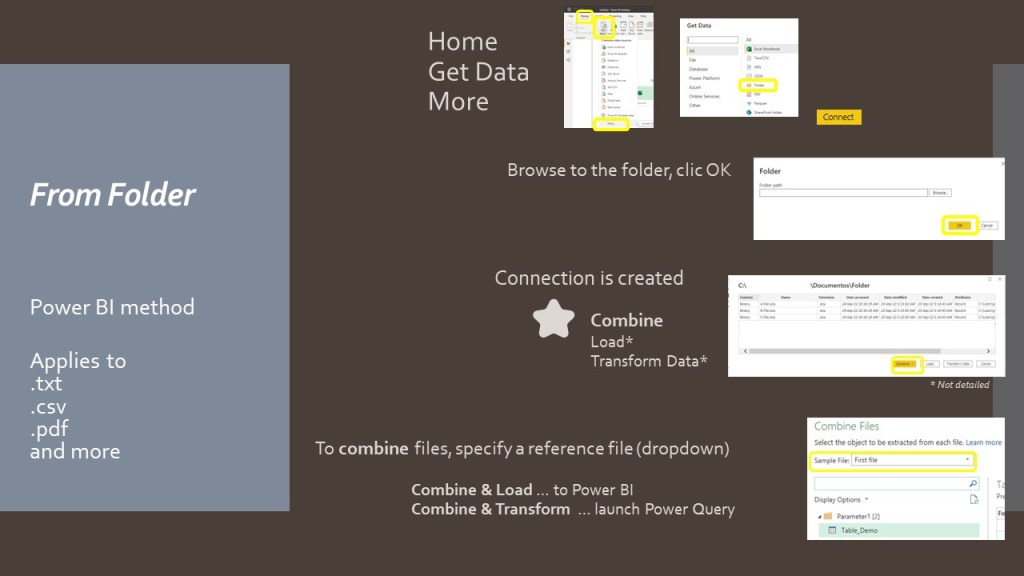
- Data/ Get Data
- Browse to the folder storing your files
- Click Open, to create the connection to the folder (yes, that’s an empty screen)
- Terminate with Combine & Transform Data to apply further transformations in Power Query
You can alternatively proceed manually:
- Repeat previous steps 1 to 3
- Click the “Combine Files” icon showed in Content column (see 1 below)
- Highlight a sample file
- Terminate with OK
If you chose the manual method, you can review and apply a filter on files metadata.
Pay attention to those icons:
This slideshow shows how to append files in Excel and Power BI:

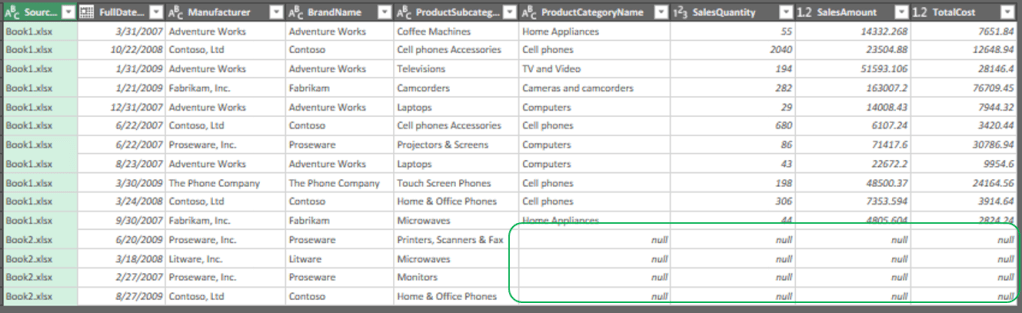
Bonus tips: what happens when…
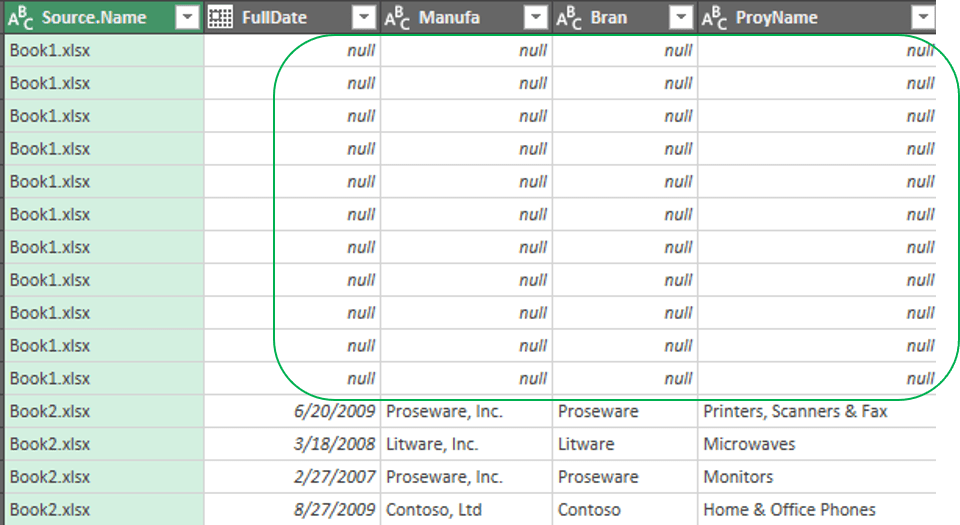
Book1 and Book2 do not have the same column number, but column names are strictly equals:
Book1 selected as Sample file:
Book2 selected as Sample file:

Book1 and Book2 do have the same column number but different column names:
Book2 selected as Sample file.
Recap
With a bit of practice, the commands shared in this blog are not complex.
The real challenge, to ensure data consistency is to extensively review each file column names.
Just select the file with more columns as Sample to avoid any data loss during the operation.
The link to the official Power Query documentation is here.
Hope you enjoy this content.

Leave a comment