
My first custom columns
This short blog explain how to execute your first lines of M code in the Custom Column formula box.
I chose this approach because when you launch Power Query via Power BI – as opposed to some Excel versions – IntelliSense auto-completion is available:

If you want to practice this post examples:
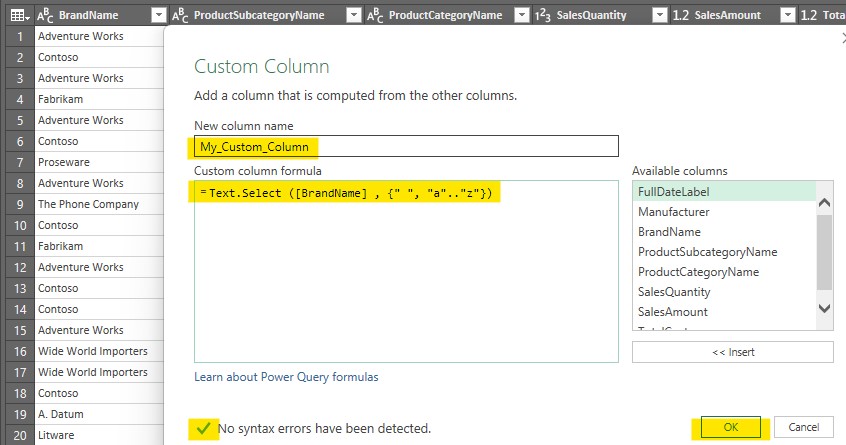
- Add Column menu/ Custom Column
- Insert a formula in the Custom Column formula box, validate with OK
- Observe the “Applied Step” window
- Open the “Advanced Editor” (View / Advanced Editor)
- Practice with other transformations
Important points:
- M is case-sensitive, IntelliSense hints are precious when coding your first M lines!
- Executing M code supposes you are familiar with data types
- M, Excel and DAX expressions are not transparent and may behave differently
In this slide I share 5 easy transformations that will help you to practice:
Code used in the slides
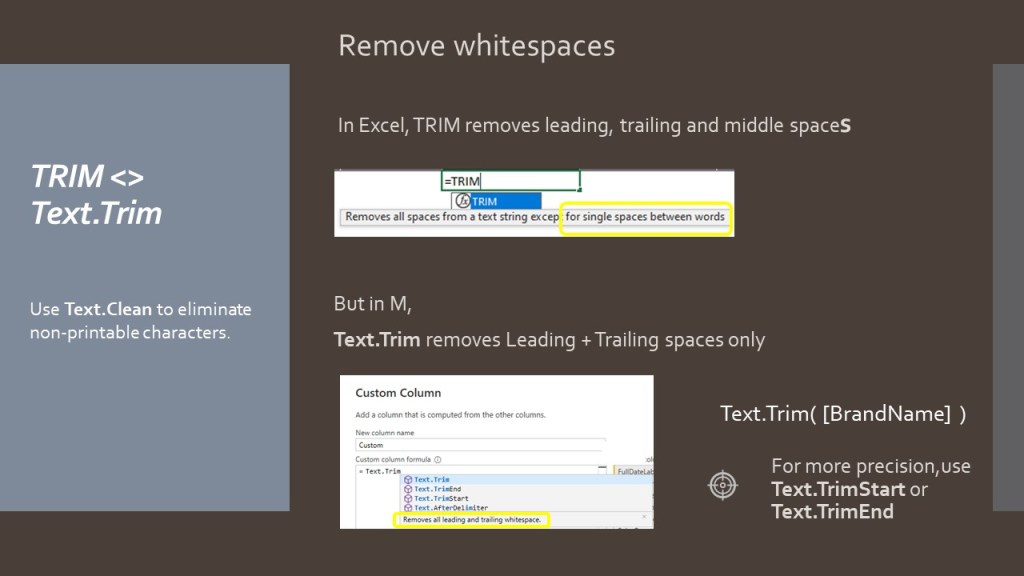
// Create a Custom column, remove trailing and leading spaces only
#"Added Custom" = Table.AddColumn( #"Previous Step", "Custom",
each Text.Trim( [BrandName] ))
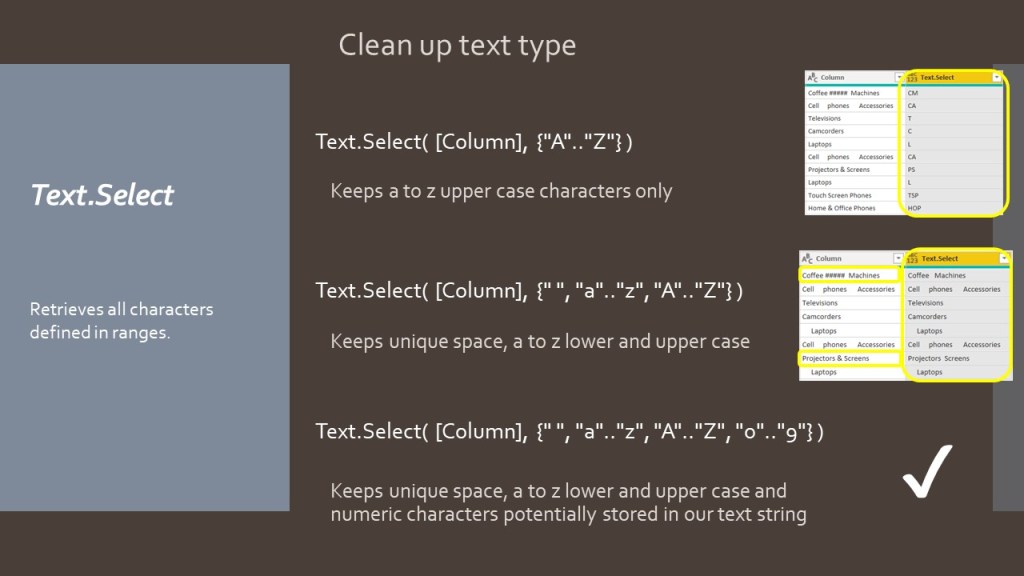
// Create a Custom column, keep only upper characters contained in BrandName
#"Added Custom1" = Table.AddColumn(#"Added Custom", "Custom.1",
each Text.Select( [BrandName] , {"A" .. "Z"} ))
// Create a Custom column, keep only space, lower case, upper case and numeric
#"Added Custom2" = Table.AddColumn(#"Added Custom1", "Custom.2",
each Text.Select( [BrandName] , {" ", "a".. "z", "A" .. "Z" , "0".."9" } ))
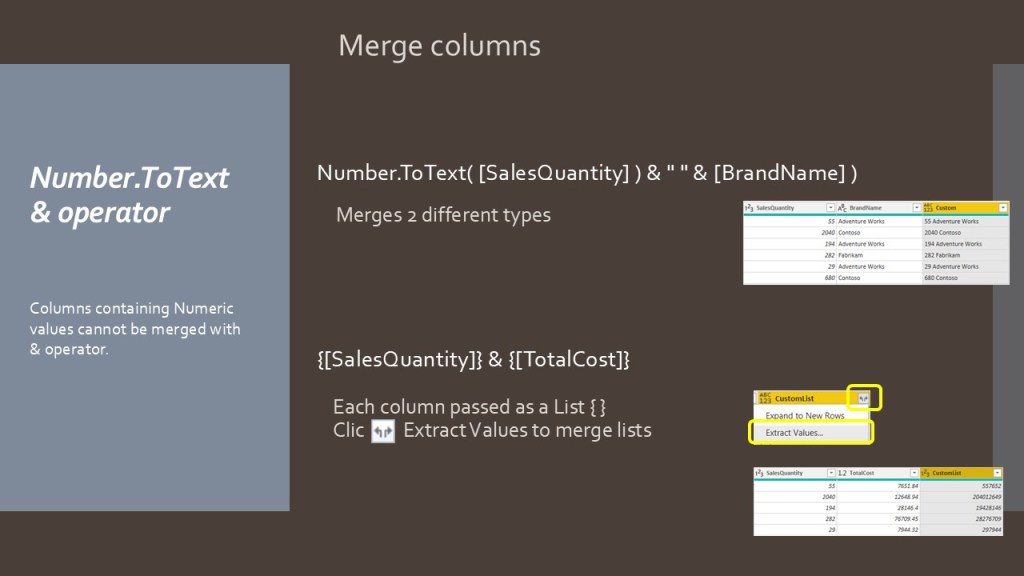
// Create a Custom column, combines number to text type, output any data type
#"Added Custom3" = Table.AddColumn(#"Added Custom2", "Custom.3",
each Number.ToText ( [Sales_Quantity] ) & " " & [BrandName] )
Leave a comment